Guide for Connecting PMS to Wifi
Supply 5V 1A power to the PMS module, and it will emit a Wi-Fi signal named “pms5003_xxx.” Use your computer or phone to connect to this Wi-Fi network (enter the password “noha.vn_” if required). Then, open a web browser and enter the IP address of the PMS: http://192.168.4.1 (Enter “admin / noha.vn_” if prompted).

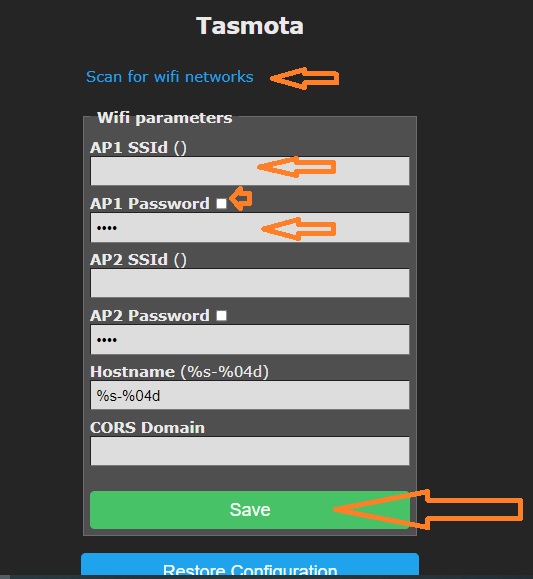
Enter your Wi-Fi name and password. You can click on “Scan for Wi-Fi Networks” to find and select your home Wi-Fi. After entering the Wi-Fi name and password, click Save. The PMS module will then connect to your home Wi-Fi.
You can obtain the local IP address on your router/wifi modem, or use applications such as Android FING, iOS Net Analyzer, or the Chrome addon mDNS Browser.
Now, the PMS module will display dust particle information on its local screen and web interface. You can access its web interface via its IP address: http://IP (For example: http://192.168.1.123).

Note:
– By default, the PMS module will connect to the MQTT broker of Noha Smart. If you don’t have a server to remotely view the PMS, please contact Noha Smart for temporary usage.
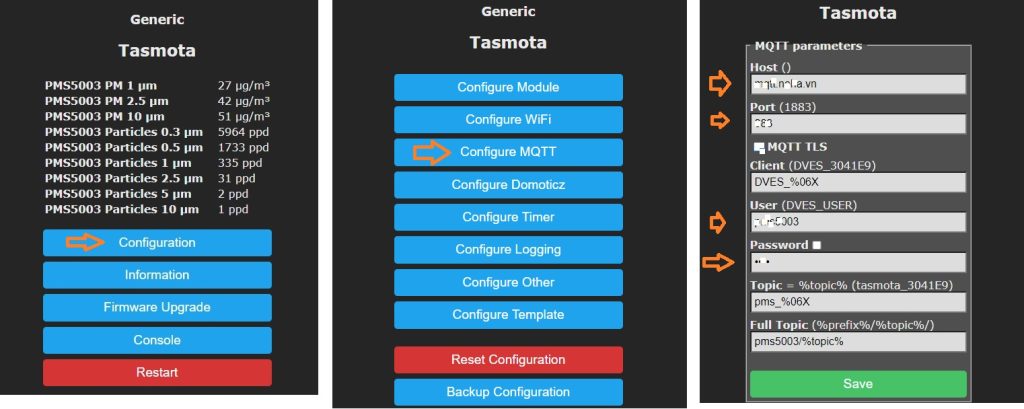
– Once you have an MQTT Broker server, follow the steps below to change the MQTT Broker address:

